How to enable Solver
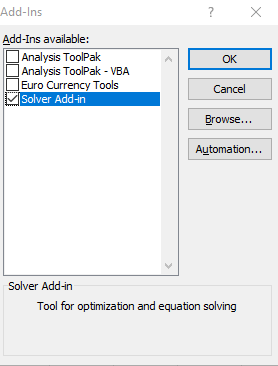
Solver is an add-in and not enabled by default. To enable it, head to file/options which will open this window.
Navigate to the add-ins tab and click ‘Go’.

Check ‘Solver add-in’ and click OK. It may take a few minutes to install. Once complete, the solver button will be available under the data tab on the ribbon.
How to use the Solver function
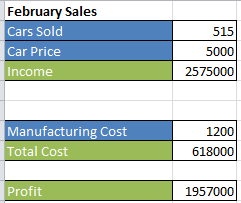
Firstly, you should start with a set of data.
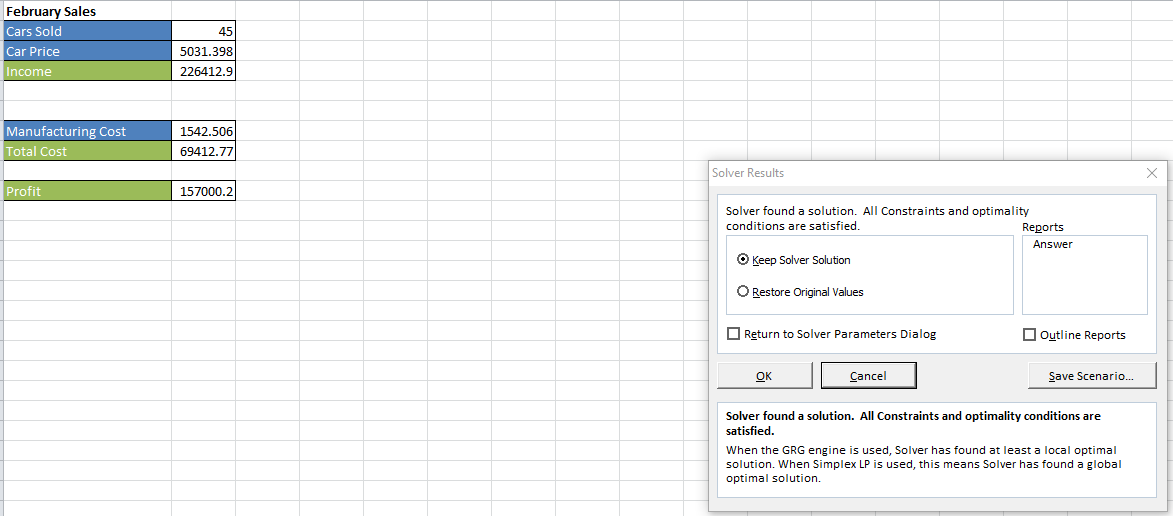
It is important to note that formulas are required for the Solver to work correctly. My example above uses 3 formulas. The 1st multiplying the cars sold by the car price to calculate the income. The 2nd multiplying the cars sold by the manufacturing cost to calculate the total cost. Finally the profit is calculated by taking the income and deducting the total cost.
Next click the solver button to open the solver window.
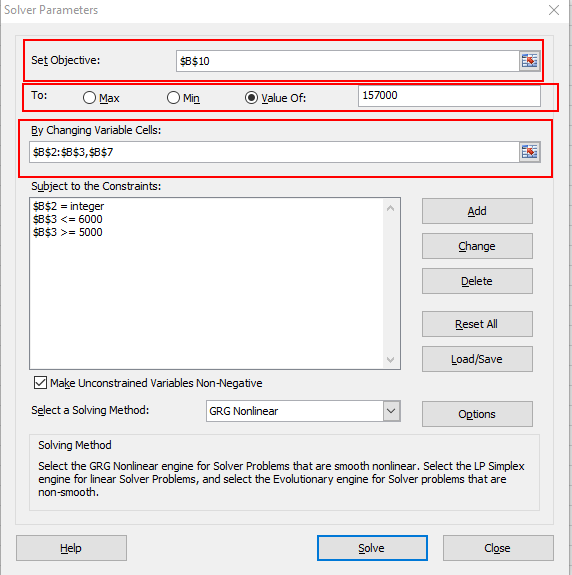
Now, you must define the following:
- Objective: This is where you select your cell to define your forecasting e.g. if you want see how many of your product you need to sell to make £1500 profit, select your profit cell.
- To: This links to the objective to define what the objective is looking for whether it is aiming for a minimum, maximum or exact value.
- By changing variable cells: Select the cells here that the Solver will change to achieve the objective
- Constraints: Criteria the Solver must follow to achieve the objective.
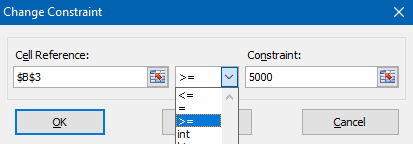
To add a constraint, click Add which will show the above window. Select the cell to apply the constraints to. Select the type of constraint and the value. The example above shows that the value of that cell must always be greater than or equal to 5000.
Once all constraints and all other inputs have been added to the solver, click solve to generate a result.
As in the example above, the Profit cell has been changed to £1500 and the cells restricted by the constraints have been kept as whole numbers and equal to £5000.
If you are happy with the solution found, click Ok with Keep Solver Solution selected, if not click cancel and make edits within the Solver window.
Additional Information
- Constraints can be selected and can be edited by clicking the change button on the right side of the main solver window.
- Selecting a constraint and clicking the delete button on the main solver window removes it.
- Reset all in the main solver window will clear criteria from the solver.
- You can save and load solver criteria by the save and load button, it will ask for a cell range to save.
- There a 3 solver methods: GRG Non-Linear used for smooth non-linear problems, Simplex LP for linear problems and Evolutionary for non-smooth problems and takes the longest to process data.
